What if your booth could feel at home in every market without looking like a different brand at each event? That’s the balance at the heart of designing a booth for international events. Cultural expectations, language differences, venue rules, and shipping logistics can all shape the experience, but they don’t have to dilute your identity.
It’s natural to want a display that stands out while still feeling clear and welcoming to local audiences. The key is to keep your core brand elements consistent, then adapt the visuals, messaging, and display mix to suit each event and audience.
This practical guide will help you create a culturally considerate booth, choose components that travel well and can be reused, and prepare artwork and production details ahead of deadlines. You’ll also learn what to clarify with event organizers, from booth dimensions and safety requirements to delivery instructions, so your plan is built for the venue as well as the audience. With coordinated design, print, fabrication, and delivery, Zodiac Event Displays can help bring a confident, cohesive brand presence to events around the world.
Key Takeaways
- Set a clear event goal first, then shape the booth experience around what attendees should notice, learn, or do.
- When designing a booth for international events, keep core brand elements consistent while tailoring supporting language and visuals to the audience.
- Match display choices to their role, from backwall presence and wayfinding to product focus and overhead visibility, with reuse in mind.
- Build a production-ready plan by organizing artwork, checking organizer specifications, and coordinating deadlines and delivery instructions.
- See how a creative production partner can connect audience-focused design with print, fabrication, and delivery for a cohesive event presence.
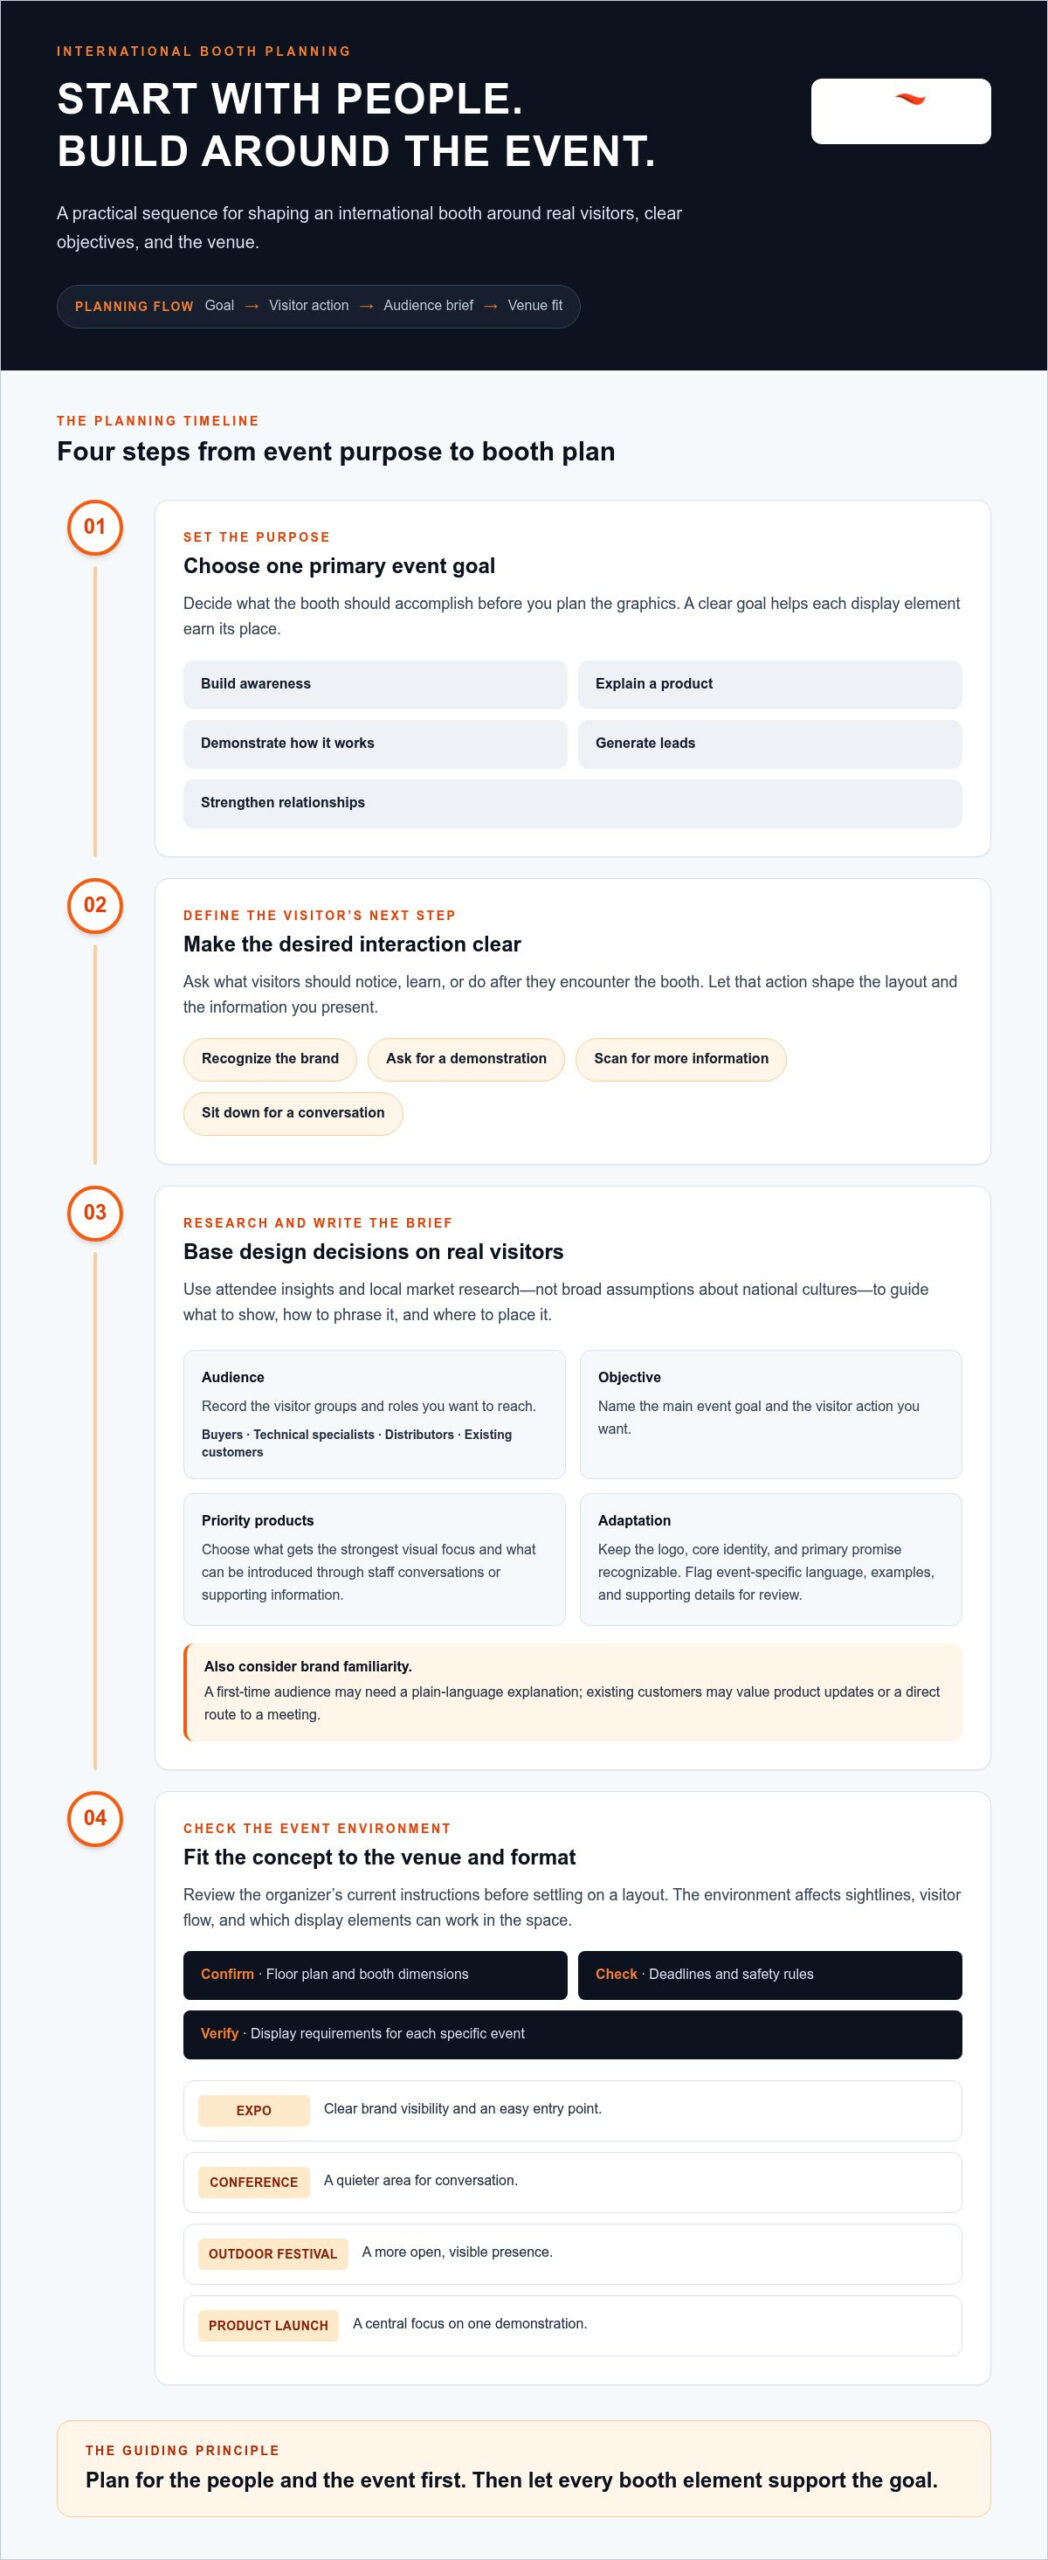
Designing a Booth for International Events Starts With Audience and Event Goals
The same booth can signal expertise at an industry expo, feel too formal at a community festival, or leave visitors at a product launch unsure where to begin. Audience expectations and event purpose shape how people read the space, what they notice first, and whether they stop to engage. That’s why designing a booth for international events starts with people and objectives, not graphics.
Choose a primary goal: build awareness, explain a product, demonstrate how it works, generate leads, or strengthen relationships. Then define the visitor’s next step. Should they recognize your brand from across the aisle, ask for a demonstration, scan for more information, or sit down for a conversation? A clear goal helps every display element earn its place.
Audience research should come before visual design because visitor roles, language needs, brand familiarity, and expected interactions determine what information to show, how to phrase it, and where to place it.
Build an international event brief around real visitors
Turn research into a short brief that guides designers and production decisions. Use attendee insights and local market research rather than broad assumptions about national cultures. A useful brief distinguishes what must stay consistent across markets from what should respond to the specific audience and event.
- Audience: Record the visitor groups and roles you want to reach, such as buyers, technical specialists, distributors, or existing customers.
- Objective: Name the main event goal and the action you want visitors to take at the booth.
- Priority products: Identify what deserves the strongest visual focus and what can be introduced through staff conversations or supporting information.
- Adaptation: Keep the logo, core identity, and primary promise recognizable; flag event-specific language, examples, and supporting details for review.
Also note how familiar visitors are likely to be with your brand. A first-time audience may need a plain-language explanation, while existing customers may value product updates or a direct route to a meeting.
Map the event environment before choosing a concept
Review the organizer’s current floor plan, booth dimensions, deadlines, safety rules, and display requirements before settling on a layout. The environment affects sightlines, visitor flow, and which display elements can work within the space. Confirm the latest instructions for each event rather than carrying assumptions from another venue or country.
Match the concept to the setting. An expo may call for clear brand visibility and an easy entry point; a conference may need a quieter area for conversation; an outdoor festival can call for a more open, visible presence; and a product launch may center attention on one demonstration. The Trade Show Overview describes trade shows as settings for business promotion and networking, but each event has its own audience and format. For a closer look at how format influences display planning, explore this custom trade show displays guide.
Adapt Booth Messaging and Visuals for International Audiences Without Diluting Your Brand
A consistent brand doesn’t require identical copy and imagery at every event. Keep your logo, core identity, and primary promise steady, then adapt supporting information to the audience: translated product details, locally relevant examples, or a call to action that fits the interaction you want. This creates a booth that feels familiar to returning customers and understandable to new visitors.
Keep the brand constant; localize the details that help each audience understand and engage with it.
Make booth copy understandable across language barriers
Give visitors a clear message at a glance. Lead with one main idea, add only the supporting phrases needed to explain it, and make the next step obvious. Short copy is easier to scan at a distance and leaves room for translated text, which may take up more or less space than the original.
For prominent headlines and technically important product information, use a professional translator and a local-language reviewer. Ask them to assess meaning, tone, context, and terminology, not just word-for-word accuracy. Then review the translated copy in the actual layout: check that it remains readable at the intended viewing distance and doesn’t crowd the logo or key visuals. Icons and product photography can reinforce the message, but shouldn’t replace essential translated information such as product details or instructions.
Organizations such as IAEE Industry Standards offer exhibition-industry resources that can inform event planning. Pair broader guidance with feedback from people who understand the specific audience and context you’re designing for.
Review color and imagery with local context
Don’t assume a color, gesture, or symbol carries the same meaning everywhere, and avoid making broad claims about an entire country or region. Instead, share draft visuals with knowledgeable local reviewers and ask focused questions: Could this symbol be misunderstood? Does the image feel relevant to this audience? Is the person shown in a role that fits the product and event? Use inclusive photography and graphics that reflect the people you want to welcome, without leaning on clichés.
Color accuracy also matters to brand recognition. Zodiac requires Pantone references for accurate matching, so supply the specific Pantone labels rather than generic descriptions such as “warm red.” CMYK can be used, but color variation is expected; compare the result with a Pantone guide when an exact match matters. This practical review helps the booth feel locally considered while keeping brand colors intentional.
- Keep fixed: Logo, core identity, and primary brand promise.
- Review for each market: Translated copy, supporting examples, symbols, photography, and calls to action.
- Check before production: Readability, color references, and how localized elements fit the finished layout.
For a unified presentation across translated graphics and display materials, Zodiac’s event branding and display work can connect design and print in one coordinated process.
Compare International Booth Display Options by Purpose, Portability, and Reuse
The right display mix is the one that serves the event goal and fits the venue, not simply the one with the boldest look. Start by assigning each component a job: draw attention, explain an offer, guide visitors, or support a conversation. Then compare options against the organizer’s rules, venue conditions, brand priorities, and how you intend to use them again. When designing a booth for international events, avoid assuming that a component’s size, weight, setup needs, or shipping suitability will be the same across formats. Confirm those details for the specific display and event.
Match display components to the job they need to do
Use this comparison as a starting point, then refine the mix around the floor plan and event brief. A component can serve more than one purpose, but assigning a primary role helps keep the booth focused.
| Booth function | Display options | Planning consideration |
|---|---|---|
| Backdrop or presentation area | Expanding Backwalls | Choose a straight or curved frame based on the layout and intended visual effect. They create a branded backdrop for presentations or media-wall settings. |
| Wayfinding and visible branding | Flags, banner stands, Pop Up Signs | Use to help visitors spot or approach the booth, subject to venue placement and display rules. |
| Registration, product, or information table | Custom Printed Tablecloths | Carry the brand across a table and keep its presentation aligned with nearby displays. |
| Meeting area or outdoor presence | Event Tents | Consider for an event setting where a tent suits the purpose and the organizer’s conditions. |
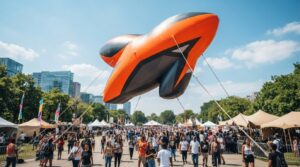
| Product focus or overhead visibility | Inflatables, Hanging Signs | Use to create a focal point or visibility from farther away, only where venue rules and conditions allow. |
Plan for reuse across different event markets
Think in layers: which parts carry the stable brand identity, and which graphics or messages need to change for a particular audience? Expanding Backwalls offer a confirmed reuse option: their frames can be reused with interchangeable fabrics, allowing graphics to be refreshed while retaining the frame. For other components, plan reuse according to their construction rather than assuming every graphic or part is interchangeable.
Separate the decisions in your plan: identify hardware intended for repeated use, then specify which printed elements need market-specific versions. This makes adaptation more deliberate and helps avoid replacing an entire display when only the message needs updating. For additional ideas on reuse and material choices, see the eco-friendly trade show displays guide.
Before finalizing the mix, compare each item with the event’s current rules, site conditions, brand objective, and reuse plan. That simple discipline keeps the booth coherent while making every component work harder across markets.
Prepare International Booth Artwork and Logistics With a Production-Ready Checklist
A strong booth concept still needs to meet two different sets of requirements: the event organizer’s current specifications and the display’s artwork preparation requirements. Keep them separate in your project plan. Organizer instructions govern matters such as booth dimensions, safety rules, artwork deadlines, and delivery details; production requirements govern how files and graphics should be prepared. For designing a booth for international events, verify current venue instructions and destination requirements for each event instead of assuming rules carry over from another country.
Zodiac accepts PC-compatible Adobe Illustrator files in AI, PDF, and EPS formats, plus Adobe Photoshop files; prepare linked images, Pantone references, outlined text, and product-specific bleed.
- Confirm organizer specifications. Gather the latest booth dimensions, display rules, artwork deadlines, delivery instructions, and any destination-specific requirements. Record the source and date of each instruction so the team is working from the same version.
- Approve the design. Check the final layout against the booth space and planned visitor experience. Review all event-specific copy and graphics, then approve one master version before production files are prepared.
- Prepare production files. Follow the artwork checklist below, including file compatibility, color references, image handling, text, and bleed. Keep the organizer’s template markings intact as references rather than flattening them into the artwork.
- Schedule production. Work backward from the organizer’s artwork deadline and event delivery window, leaving time for review and corrections between approval and production.
- Plan delivery and setup. Keep final approved files, version notes, delivery instructions, and on-site setup information together. Recheck the organizer’s current directions before materials are dispatched.
Prepare artwork to Zodiac’s production requirements
Use Illustrator AI, PDF, or EPS files, or Photoshop files, and don’t use InDesign. Files must be PC-compatible, not Mac-compatible. For accurate color matching, provide Pantone specifications; gold and fluorescent Pantones in the 800 series can’t be printed. CMYK is possible, but color variation is expected, so use a Pantone guide to verify exact matches.
- At 100% print size, photos and JPG or PSD images must be 72-100 ppi/dpi. Don’t send 300 ppi images; link images as separate files rather than embedding them. GIF, PNG, and TIFF files aren’t accepted for banners, and JPGs over 20 MB aren’t suitable for full-background use.
- Keep PSD files to five layers or fewer at 72 ppi; flattened PSD or JPG is preferred. Set line thickness to at least 0.1 inches.
- Use the product-specific bleed, which varies from 0.7 to 3 inches. Plain banners require 2 inches all around. Convert text to outlines or curves, preferably, or supply the font file. Keep template markings visible as references.
Coordinate approvals, production, and global delivery
Build in time to review artwork versions and resolve file issues before production begins. Zodiac brings design, print, fabrication, and global delivery together, supporting the path from an approved concept to event-ready display materials. For a coordinated production plan, start your event display project.
Bring Your International Booth Concept to Life With a Full-Service Display Partner
International booth planning brings several moving parts together: audience insight, locally relevant messaging, display choices, production artwork, approvals, and delivery. A creative production partner can help connect those decisions so the booth feels cohesive from the first design conversation to the finished display. With over ten years in soft signage and event branding, Zodiac Event Displays supports projects through design, print, fabrication, and global delivery.
Collaborate from concept through production
Start with the event brief, then shape the display around its audience, goals, venue, and intended visitor experience. Design support can bring the message, graphics, and selected components into one visual system, whether the booth calls for Flags to draw attention, an Expanding Backwall as a branded backdrop, a Custom Printed Tablecloth for an information table, or Tents and Inflatables for an appropriate event setting. Each choice should fit the organizer’s requirements and the role it needs to play.
Turn the final brief into a clear next step
Before moving forward, bring the core decisions into one working brief. A concise, organized handoff helps everyone understand what the booth needs to communicate and what must be ready for the event.
- Audience and objective: Define who the booth is for and what you want visitors to understand or do.
- Event specifications: Gather current organizer details, including booth requirements, artwork deadlines, and delivery instructions.
- Display roles: List the components needed for visibility, product focus, information, or conversation.
- Artwork and approvals: Identify localized graphics, file-preparation needs, reviewers, and the person approving final artwork.
- Delivery and setup: Organize destination instructions and the event’s on-site information without assuming requirements are the same across locations.
That brief gives the design and production process a clear foundation while leaving room to adapt supporting details for each market. It also helps keep artwork versions, decisions, and delivery planning aligned as the project progresses.
If you’re ready to shape the concept with a production partner, discuss your international event project. To see display options that can support your plan, explore Zodiac’s event display solutions.
Make Your Next International Event a Stronger Brand Moment
Think beyond the opening day. Each event can reveal which questions visitors ask, what sparks conversation, and which parts of your booth draw attention. Capture those observations while they’re fresh, then use them to refine the next edition. Over time, your international presence can become more responsive without losing its recognizable character.
That forward momentum starts with a clear brief and a partner who can carry the idea into production. Zodiac brings more than ten years of soft signage and event branding experience, with design, print, fabrication, and global delivery connected in one process. Reusable Expanding Backwall frames with interchangeable fabrics can also give your graphics room to evolve across events.
Ready to shape a display around your next audience and opportunity? Explore Zodiac’s event display solutions and take the next step toward designing a booth for international events with confidence. Your next event is a chance to make your brand feel both familiar and freshly relevant.
Frequently Asked Questions
How do you make an international booth welcoming to visitors who speak different languages?
Make the first interaction easy to understand, even before a conversation begins. In designing a booth for international events, use a short welcome, a clear product category, and a simple next step, then provide key information in the languages your audience uses. A QR code can lead to fuller translated details, but keep essential information visible on the booth itself. Train staff to greet visitors warmly and offer a clear way to continue the conversation.
Should every graphic at an international trade show be translated?
No. Translate information visitors need to understand or act on, such as product benefits, instructions, or a call to action. A logo, brand mark, or purely decorative image usually doesn’t need translation. Review each graphic by asking what job it does: if it carries important meaning, adapt it; if it builds visual recognition without words, it may stay as designed. This keeps the display readable instead of crowded with unnecessary copy.
How can I avoid cultural stereotypes in an international booth design?
Base visual decisions on feedback from people familiar with the specific audience, not assumptions about a whole country or region. Share draft images, symbols, and color choices with local reviewers and ask what feels unclear, dated, or out of place. You can also test the visuals with customers or colleagues who know the market. If a decorative detail relies on a broad cultural cliché rather than a real connection to your brand, leave it out.
Can one booth design work for multiple international events?
Yes, if you treat it as a flexible design system rather than one fixed arrangement. Keep core brand elements consistent, while planning defined areas for local headlines, translated details, or event-specific product information. Create and approve separate versions for each market, and check that each fits the event’s current booth specifications. This approach helps preserve recognition while giving teams room to adjust the message and layout for different audiences.
What should I check before sending booth artwork to print?
Run a final proof review for spelling, translated text, image placement, logo clarity, and any copy that may be clipped or hard to read at the intended viewing distance. Compare the proof with the approved version and the event layout, then confirm that every linked image is included and the correct file version is being sent. Keep a record of who approved the final artwork so the production team works from one clear master.
How can event staff support an international booth design?
Staff bring the design to life by guiding visitors toward the information or interaction the booth is built around. Give the team a short opening line, a plain-language explanation of the main offer, and a clear handoff for detailed questions. Agree on who leads demonstrations, who records follow-up requests, and how unanswered questions will be captured. Encourage staff to listen first and adapt their explanation to each visitor rather than relying on a memorized pitch.
 Previous reading