


What if the most daunting part of your next event wasn’t the high-stakes presentation, but the towering ten-foot wall of fabric standing between you and a flawless brand presence? You’ve likely felt that familiar prickle of anxiety while staring at a pile of aluminum tubes, wondering if you’re about to engage in a public wrestling match with your own display. It’s a common hurdle for the solo exhibitor who demands perfection but lacks a second pair of hands during a frantic move-in. We believe that professional excellence shouldn’t require a full crew, and mastering how to set up a tension fabric backdrop by yourself is the ultimate secret to trade show independence.
This guide is your strategic ally, designed to transform a potentially physical struggle into a graceful, ten-minute victory. We’ll show you how to leverage the physics of lightweight frames and high-quality 8.8 oz polyester to achieve a perfectly smooth, branded backwall that commands attention. By following our specialized techniques, you’ll gain the confidence to handle premium event hardware solo, ensuring your display meets NFPA 701 fire safety standards while looking effortlessly sophisticated. From the initial frame assembly to the final, satisfying click of the pillowcase zipper, you’re about to master the art of the high-impact solo setup.
Key Takeaways
- Discover why lightweight aluminum tube frames and pillowcase-style graphics are the gold standard for solo exhibitors aiming for a premium, wrinkle-free finish.
- Master the specialized “Gravity Lean Technique” to learn how to set up a tension fabric backdrop by yourself in under ten minutes with zero physical struggle.
- Implement the “Solo Symmetry” check to ensure your branding is perfectly aligned and high-impact, effectively acting as your own quality control team.
- Learn professional maintenance secrets, like the “Inside-Out” fold, to protect your fabric’s vibrancy and maintain critical fire-retardant safety certifications.
- Gain the strategic confidence to handle high-end event hardware alone, transforming your booth setup into a seamless part of your creative presentation.
Tension Fabric Backdrops: The Solo Marketer’s Choice
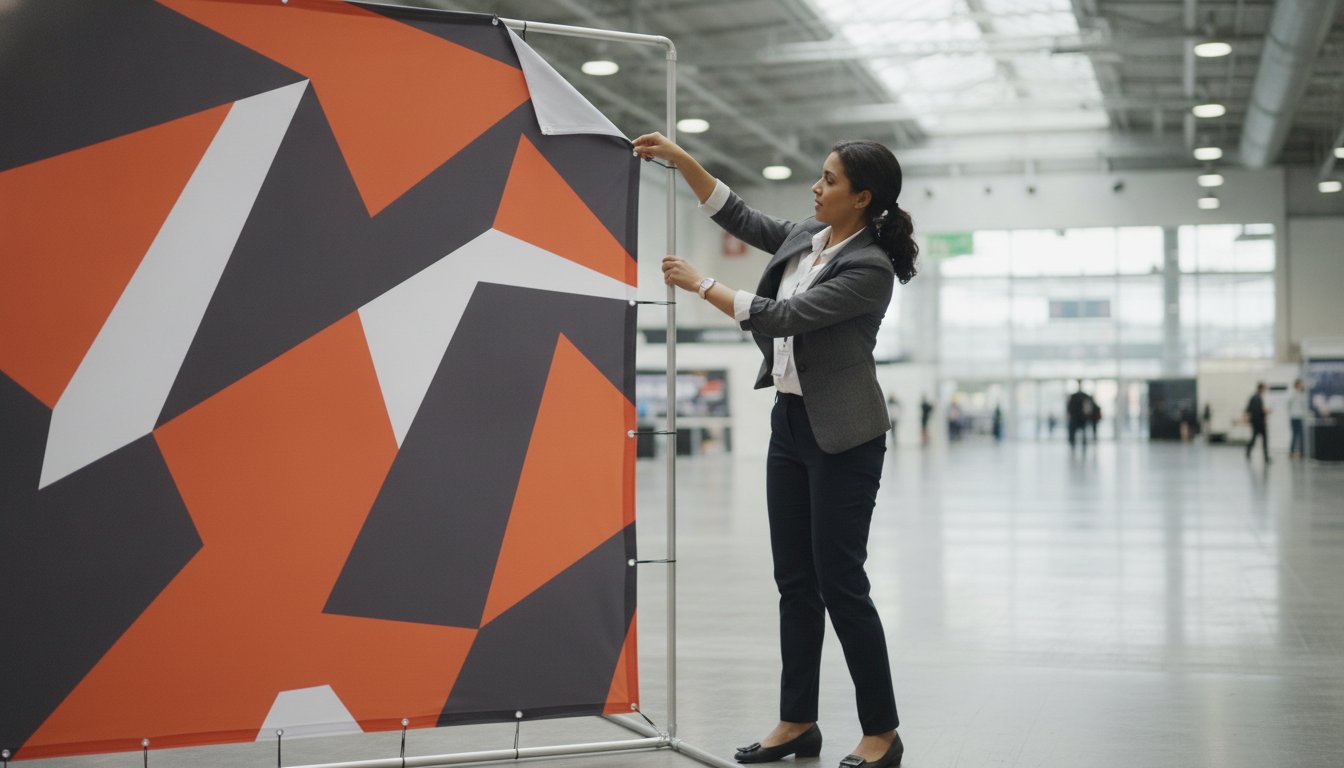
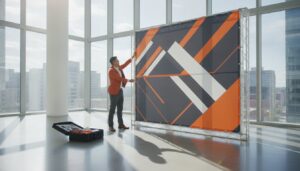
Success on the event floor isn’t just about showing up; it’s about commanding the space with a presence that feels both effortless and high-end. For the solo marketer, the choice of hardware often dictates the entire experience. Traditional rigid pop-up displays, while sturdy, are often heavy, cumbersome, and prone to mechanical failure. In contrast, the tension fabric backwall is a masterpiece of lightweight engineering. By understanding the trade show environment, you’ll see why agility is your greatest asset. Learning how to set up a tension fabric backdrop by yourself starts with appreciating the “pillowcase” design. This system involves a high-quality aluminum tube frame that your graphic slides over like a sleeve, creating a drum-tight surface that looks professionally installed every time.
The science of tension is what sets these displays apart. While vinyl banners often retain stubborn creases from being rolled, dye-sublimated polyester fabric uses the frame’s own structure to pull wrinkles flat. It’s a self-correcting system. If you’ve ever struggled with the “lean” of a retractable banner stand or the amateur look of pipe-and-drape, you’ll find the stability of a tension frame refreshing. It provides a solid, architectural anchor for your booth without the need for a multi-person crew.
The Visual Advantage of Soft Signage
Soft signage offers a sophisticated aesthetic that rigid materials simply can’t match. The 8.8 oz polyester fabric features a beautiful matte finish, which is essential for avoiding the harsh glare of overhead convention center lights during professional photography. Because the ink is dye-sublimated directly into the fibers, the colors achieve a depth and vibrancy that makes your brand pop. This seamless backwall eliminates the distracting vertical lines found in older panel systems, instantly elevating your brand authority in a crowded hall. It’s about creating a polished, high-impact environment that invites engagement.
Achieving this level of immersion often requires a holistic approach to booth design. For instance, Coker Exhibition Systems Ltd (CokerExpo) provides bespoke wall coverings and display solutions that help solo exhibitors create a seamless, professional environment that extends beyond the backdrop itself.
Engineering for Mobility and Ease
Aluminum is the solo traveler’s best friend. These frames are incredibly light, yet they maintain structural integrity under the pressure of the stretched fabric. Most modern systems utilize bungee-corded logic, where the tubes are connected internally. This prevents the nightmare of lost parts and makes the assembly sequence intuitive. You won’t need a toolbox or a manual to figure out which piece goes where. A massive 10-foot display can collapse into a single padded carry bag, making the journey from the parking lot to the booth a breeze. When you’re working alone, this portability is a strategic advantage that saves both time and physical energy.
Preparation: The Solo Setup Toolkit and Frame Logic
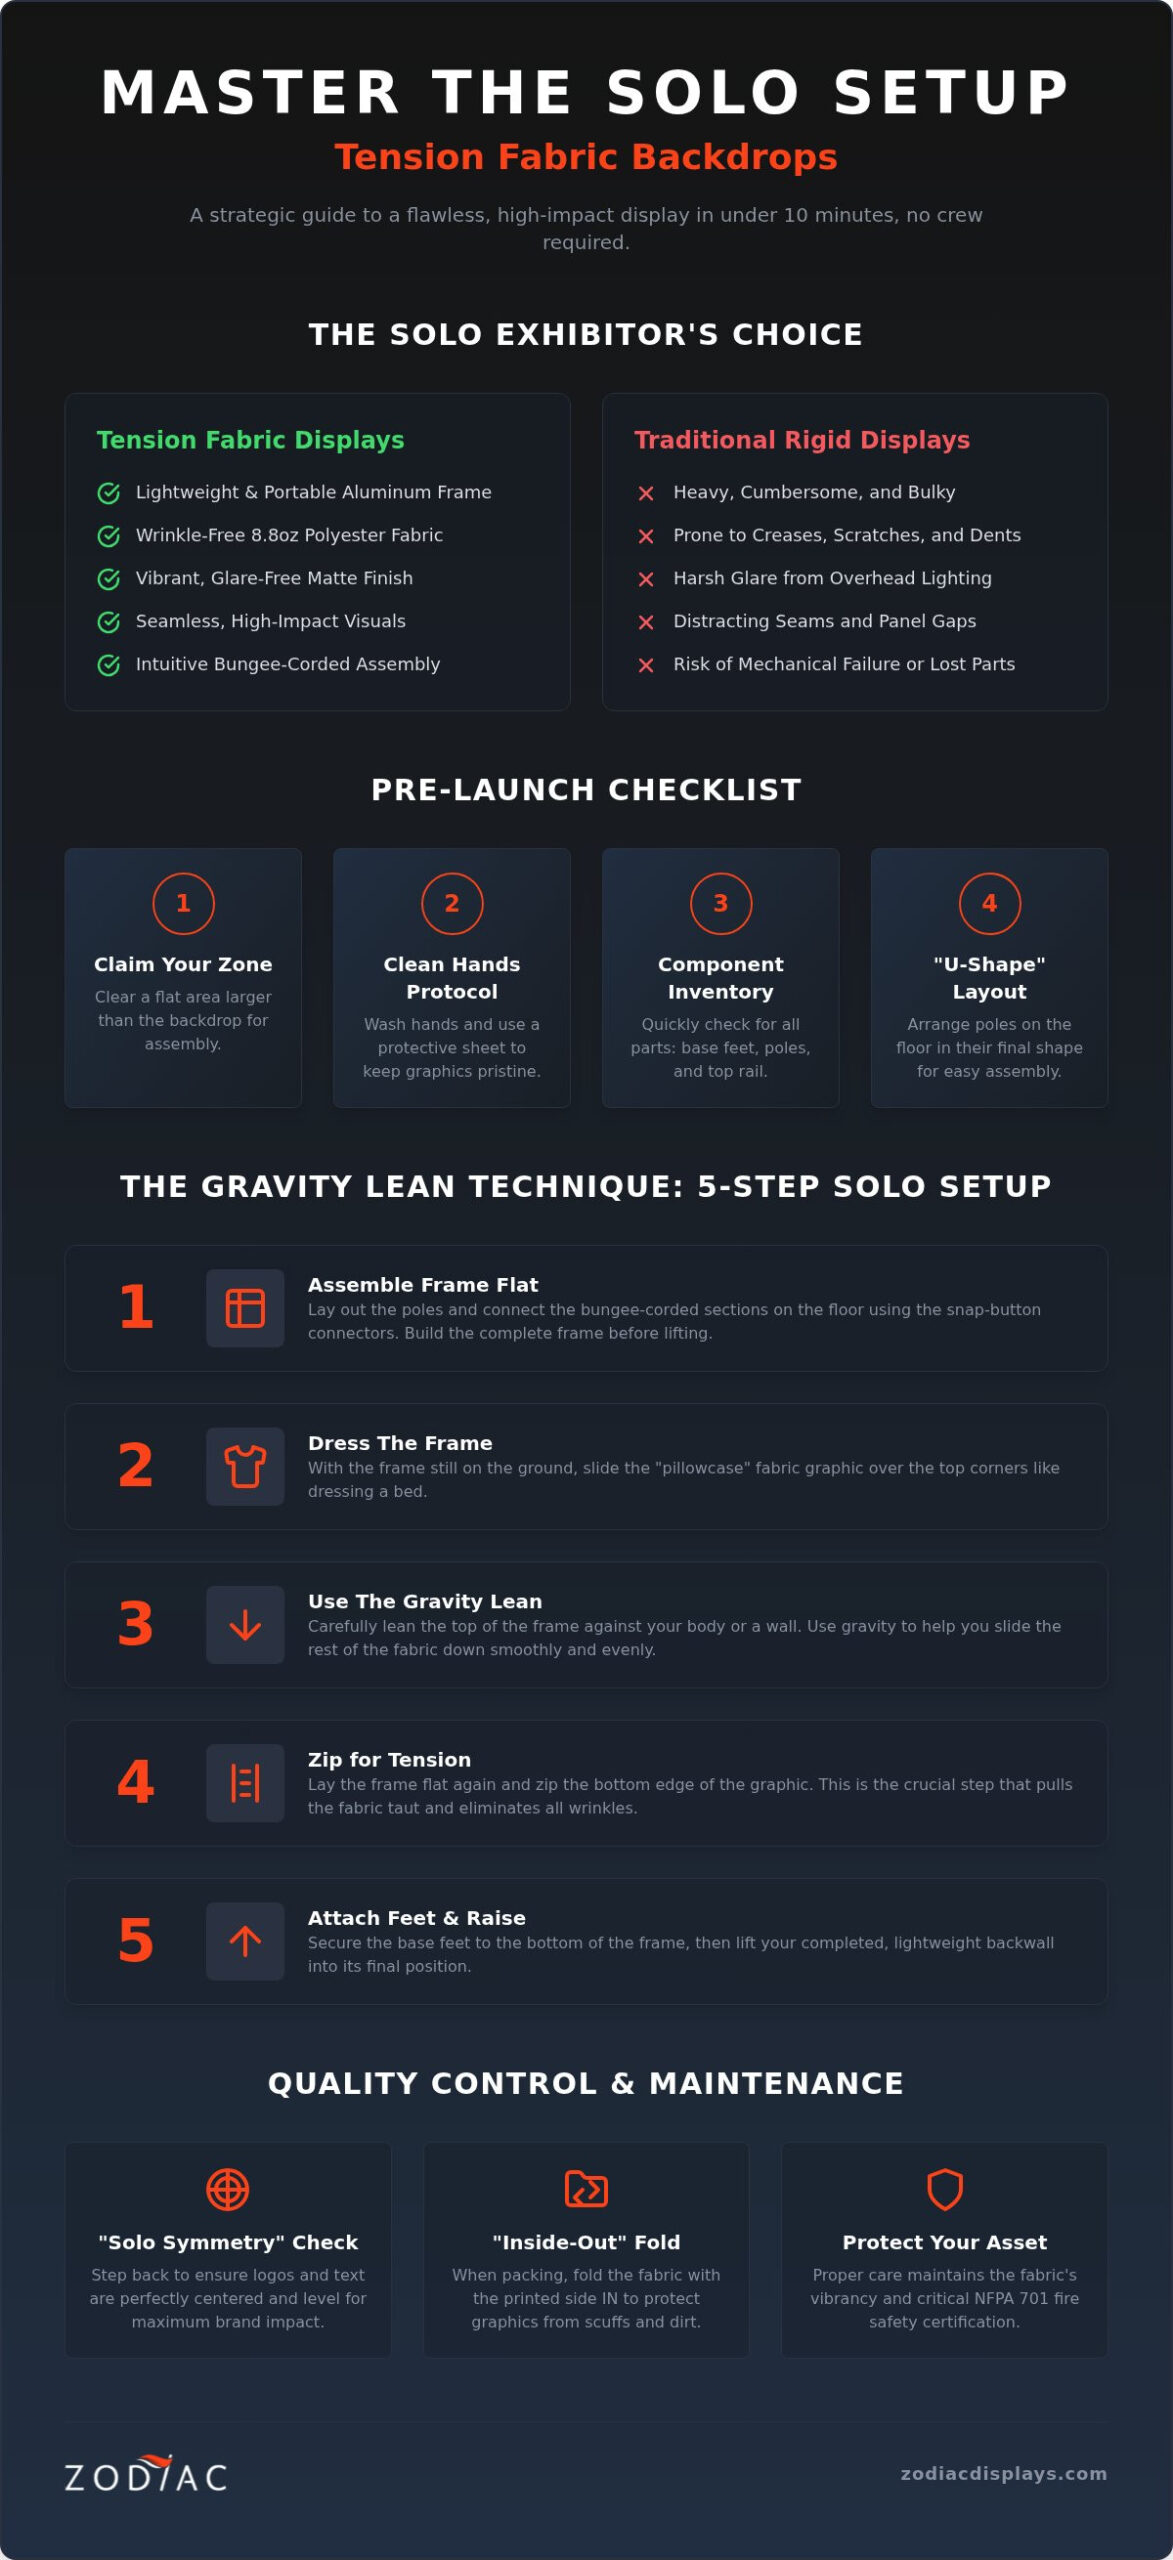
Before you even touch the hardware, you need to claim your territory. In a busy convention center, space is a luxury, but setting up a high-impact display requires a dedicated “landing zone.” Clear a flat area on the floor that’s slightly larger than the backdrop itself. This is where the “Clean Hands” rule comes into play. Given the significant value of trade shows as a marketing investment, you can’t afford a smudge on your brand’s first impression. Trade show floors are notoriously dusty, and your pristine custom graphic is a magnet for grime. Keep your hands washed and lay down your carry bag or a clean sheet to act as a protective barrier before you begin the process of learning how to set up a tension fabric backdrop by yourself.
Next, perform a swift inventory check. A standard tension display consists of a few key components: the base feet, the vertical support poles, and the curved or straight top rail. Most modern backwall displays utilize snap-button connectors, which are far superior for solo work than screw-in alternatives that require extra tools. Lay your components out in the order they’ll be assembled. This prevents you from hunting for a specific pole while you’re half-way through the build. Organization isn’t just about neatness; it’s about maintaining your momentum when you’re the only person on the clock.
Organizing Your Workspace Solo
The secret to speed is the “U-Shape” layout strategy. Instead of a messy pile, arrange your poles on the ground in the shape of the finished frame. This visual map ensures you haven’t missed a connection before you start clicking pieces together. Always assemble the frame while it’s lying flat on the floor; trying to build a 10-foot wall vertically while working alone is a recipe for frustration and potential hardware damage. By keeping the frame grounded, you maintain full control over the assembly physics and protect the aluminum from unnecessary stress.
Hardware Mastery: Snap-Buttons and Feet
Mastering the hardware is about finesse, not force. If a snap-button feels stubborn, don’t pinch your fingers; simply use the edge of another pole or a small flat tool to depress the spring. Bungee-corded frames are the primary tool for solo speed because they keep the sequence of poles logically connected and impossible to lose. Before the fabric goes on, double-check that the stabilizing feet are oriented correctly, pointing forward and backward to provide a wide, sturdy base. This preparation ensures that once the tension is applied, your display stands perfectly upright without a hint of a wobble, projecting the authoritative presence your brand deserves.
Step-by-Step Solo Installation: The Gravity Lean Technique
Mastering how to set up a tension fabric backdrop by yourself requires a shift in perspective. You’re not just assembling hardware; you’re orchestrating a series of balanced movements. Once your aluminum frame is locked and lying flat on your protective “landing zone,” it’s time to introduce the fabric. Position the “pillowcase” graphic at the top of the frame. Instead of trying to pull the entire weight of the 8.8 oz polyester from the bottom, you’ll work from the top down. This grounded approach ensures that gravity works with you rather than against you, preventing the frame from buckling or shifting as you apply the initial tension.
The process follows a logical sequence that eliminates the need for a second set of hands. By keeping the unit horizontal, you maintain total control over the alignment. You’ll avoid the frantic reaching and stretching often associated with vertical installations. This method is the secret to a wrinkle-free finish, as it allows you to smooth the fabric evenly across the bars before the frame is ever stood upright. It’s a strategic maneuver that prioritizes precision over power.
The ‘Bunch and Slide’ Solo Maneuver
Success lies in the rhythm. Never pull the fabric from the bottom edge; this creates uneven tension and leads to frustrating snags on the aluminum joints. Instead, bunch the fabric at the top corners and slide the “sleeve” down the tubes in small, manageable increments. Walk from side to side, moving each edge down about six inches at a time. If you encounter a “Corner Catch” on a curved frame, simply reach inside the sleeve to ease the fabric over the bend. This rhythmic approach ensures the graphic remains centered and the internal seams align perfectly with the frame’s edges.
Lifting the Display Without a Partner
The “Center-Pivot” lift is where your preparation pays off. Once the fabric is slid three-quarters of the way down, find the balance point at the center of the top rail. Lift the frame slowly, allowing the base to remain on the floor as a pivot point. Once the unit is vertical, slide the fabric the rest of the way down and secure the stabilizing feet. Finally, close the industrial pillowcase zipper at the bottom. This final step creates the signature drum-tight tension that makes your brand look impeccable. You’ve just turned a two-person job into a solo victory.
Solo Troubleshooting: Perfecting the Visual Impact
Once the unit is standing, the real work of a creative strategist begins. Achieving a professional finish isn’t just about assembly; it’s about the final five percent of effort that separates an amateur booth from a high-impact brand experience. The first step is the “Solo Symmetry” check. Step back at least ten feet and look for any warping in your logo. If the branding appears tilted, you likely have more fabric bunched on one vertical tube than the other. When you’re mastering how to set up a tension fabric backdrop by yourself, you must be your own quality control. Simply reach behind the display and gently shift the fabric sleeve until the horizontal lines of your design align perfectly with the floor.
Wrinkles are the enemy of authority. While the natural tension of the 8.8 oz polyester usually pulls most creases flat within minutes, some stubborn fold lines might persist. Don’t resort to unsightly clamps that ruin the clean lines of your display. Instead, use a portable hand steamer on the back of the fabric. This allows the heat to relax the fibers without risking damage to the printed face. If you’re in a rush, a light mist of distilled water can also help the tension do its work more effectively. For complex designs where placement is critical, you can Contact Zodiac for custom graphic layout advice to ensure your art is optimized for the frame’s specific tension points.
Eliminating the ‘Shadow Gap’
A common mistake for solo exhibitors is leaving a “shadow gap” where the fabric doesn’t fully wrap around the aluminum tubes. This creates a distracting line of light at the edges of your display. To fix this, ensure the internal seams are tucked neatly behind the frame. The bottom zipper should be pulled tight so the seam disappears under the curve of the base. This creates a perfectly flat, seamless face that commands attention. If you’re looking for more ways to elevate your presentation, explore our guide on fabric backwall displays to understand the strategic impact of a well-executed exhibit.
Solo Lighting Hacks
Lighting is the secret weapon that enhances the texture and vibrancy of your graphics. When working alone, clipping LED lights to the top can be tricky if you don’t have a ladder. A smart solo hack is to clip the lights to the vertical poles at chest height and then slide them up to the top rail. Position your lights at a 45-degree angle to prevent “hot spots” that wash out your branding. Proper illumination ensures your message remains legible from across the hall, turning a simple backdrop into a luminous beacon for your business. To find the perfect lighting accessories for your next event, browse our full range of premium event hardware today.
Zipper snags can feel like a disaster when you’re the only person in the booth. If the industrial zipper catches on the fabric, use the “Back-and-Fill” technique. Don’t force it forward. Instead, pull the slider back an inch, flatten the fabric with your thumb, and then zip forward again while maintaining slight outward pressure. This one-handed maneuver keeps the hardware moving smoothly and ensures that signature drum-tight finish every time.
Maintenance and Longevity: Protecting Your Brand Asset
Your event was a triumph, but the work isn’t finished until your equipment is safely stored for the next engagement. Protecting your backwall display is just as vital as the initial setup. When you’ve mastered how to set up a tension fabric backdrop by yourself, you also need to master the solo teardown to ensure your investment lasts for years. The “Inside-Out” fold is your best defense against the rigors of travel. By folding the fabric so the printed face is tucked inward, you ensure that any accidental scuffs or environmental dust during transit only affect the unprinted back. This simple habit preserves the visual vibrancy of your brand, keeping your graphics as crisp as the day they were printed.
Maintaining the fabric’s integrity involves more than just keeping it clean. Most premium tension fabrics are treated to meet NFPA 701 fire safety standards, which are mandatory at many major venues. If your graphic needs a refresh, machine wash it in cold water on a gentle cycle. Avoid harsh detergents or bleach, as these can strip away fire-retardant properties and dull the dye-sublimated colors. Air drying is the safest route to prevent shrinkage, ensuring the “pillowcase” fit remains drum-tight. A well-maintained backdrop isn’t just a financial asset; it’s a sustainable choice that reduces waste by extending the life of your hardware. Don’t forget to wipe down your aluminum tubes with a dry cloth to prevent oxidation and keep the snap-button springs moving freely.
The Strategic Teardown
Reversing the “Gravity Lean” technique is the safest way to disassemble solo. Lay the unit back down on your clean landing zone before unzipping the base. Once the fabric is removed, utilize the “Z-Fold” method to minimize deep creases. Instead of rolling, which can trap heat and set wrinkles, a loose Z-fold allows the fabric to breathe within its carry bag. Take a moment to label your frame components if the factory markings have faded. A small piece of painter’s tape marking “Top Left” or “Bottom Right” can save precious minutes at your next move-in, making your solo performance even more efficient.
Partnering for Future Growth
One of the greatest benefits of the aluminum tube system is its incredible longevity. You don’t need to purchase a completely new system every time your marketing strategy evolves. You can simply “re-skin” your existing frame with a new custom graphic, a move that is both cost-effective and environmentally conscious. As you look toward your next global event, Zodiac Event Displays stands ready to act as an extension of your creative team, providing boutique-level support for all your signage needs. Success in the trade show arena is an endurance race. Having the right tools and the knowledge of how to set up a tension fabric backdrop by yourself ensures you cross the finish line with your brand authority fully intact. We’re here to guide you through every complex creative process, ensuring your visibility remains unmatched.
Master Your Presence on the Global Stage
Embracing the role of a solo exhibitor doesn’t mean compromising on visual impact. By mastering the strategic maneuvers of the Gravity Lean and utilizing the intuitive engineering of aluminum tube frames, you’ve transformed a potential hurdle into a showcase of professional precision. Understanding how to set up a tension fabric backdrop by yourself is more than just a logistical skill; it’s a testament to your brand’s agility and your dedication to a flawless presentation. You now possess the toolkit to ensure a drum-tight, wrinkle-free backwall that commands authority from the moment the hall doors open. From the rhythmic bunch-and-slide installation to the protective inside-out fold, every step you take reinforces the longevity of your brand asset.
Ready to elevate your next event? Elevate your brand presence with a custom backwall from Zodiac Event Displays. Our boutique design mastery and global delivery capabilities ensure you have durable, solo-friendly hardware that stands the test of time and travel. Step into your next show with the confidence of a seasoned strategist, knowing your display is as resilient and vibrant as your vision. Your journey toward effortless, high-impact exhibiting starts here.
Frequently Asked Questions
Can one person really set up an 8ft or 10ft tension fabric backdrop?
Yes, a single person can comfortably assemble an 8ft or 10ft display thanks to the lightweight nature of the aluminum tube frames. These systems are specifically engineered for solo mobility, weighing significantly less than traditional pop-up booths. By utilizing the floor-assembly method discussed earlier, you maintain total control over the structure without needing a second set of hands to stabilize the frame during the process.
How do I get wrinkles out of a tension fabric backdrop by myself?
The frame’s own tension naturally pulls most wrinkles flat as soon as the pillowcase graphic is zipped shut. For any stubborn creases resulting from long-term storage, a portable hand steamer is your best tool. Simply steam the back of the fabric while the unit is standing to relax the polyester fibers without affecting the vibrant dye-sublimated print on the front face of your display.
What happens if the zipper breaks during a solo setup?
If a zipper fails during your setup, don’t panic; a few strategically placed safety pins on the bottom edge can provide a temporary, drum-tight fix. This emergency maneuver keeps your display looking professional until you can arrange for a graphic repair. To avoid this entirely, always use the “Back-and-Fill” technique to clear snags gently rather than forcing the slider forward with high pressure.
How long does it take to set up a tension fabric display alone?
A solo exhibitor can typically complete the entire setup in approximately 10 to 15 minutes once they are familiar with the hardware. Mastering how to set up a tension fabric backdrop by yourself involves organizing your workspace first to eliminate hunting for parts. This efficiency allows you to focus your remaining time on fine-tuning your booth’s lighting and engaging with potential clients as they arrive.
Do I need any tools to assemble the aluminum tube frame?
No tools are required for the assembly of these modern backwall displays because they utilize intuitive snap-button connectors. The aluminum tubes click into place with simple hand pressure, making the process both fast and tool-free. This design choice is a major advantage for the solo traveler, as it eliminates the need to carry a heavy toolkit through security or across a vast convention floor.
Is it better to set up the backdrop standing up or lying down?
It’s always better to assemble the frame and slide the fabric on while the unit is lying flat on the floor. This grounded approach prevents the frame from tipping and allows you to align the seams perfectly without reaching above your head. Once the fabric is secure, the unit is light enough to be pivoted into a vertical position with minimal physical effort.
How do I clean the fabric if it gets dirty during a solo installation?
If your graphic picks up dust during installation, spot clean the area immediately with a damp, lint-free cloth and mild soap. For more extensive cleaning after the event, the polyester fabric can be machine washed on a cold, gentle cycle. Always avoid bleach to protect the fire-retardant properties and air dry the graphic to ensure it maintains its perfect “pillowcase” fit on the aluminum frame.
Can tension fabric backdrops be used outdoors by a solo exhibitor?
Tension fabric displays can be used outdoors, but they require additional weights or sandbags on the base feet to prevent them from acting like a sail in the wind. While the fabric is durable, these units are primarily designed for controlled indoor environments. When learning how to set up a tension fabric backdrop by yourself for an outdoor event, always check the local weather forecast and secure the base thoroughly.
 Previous reading