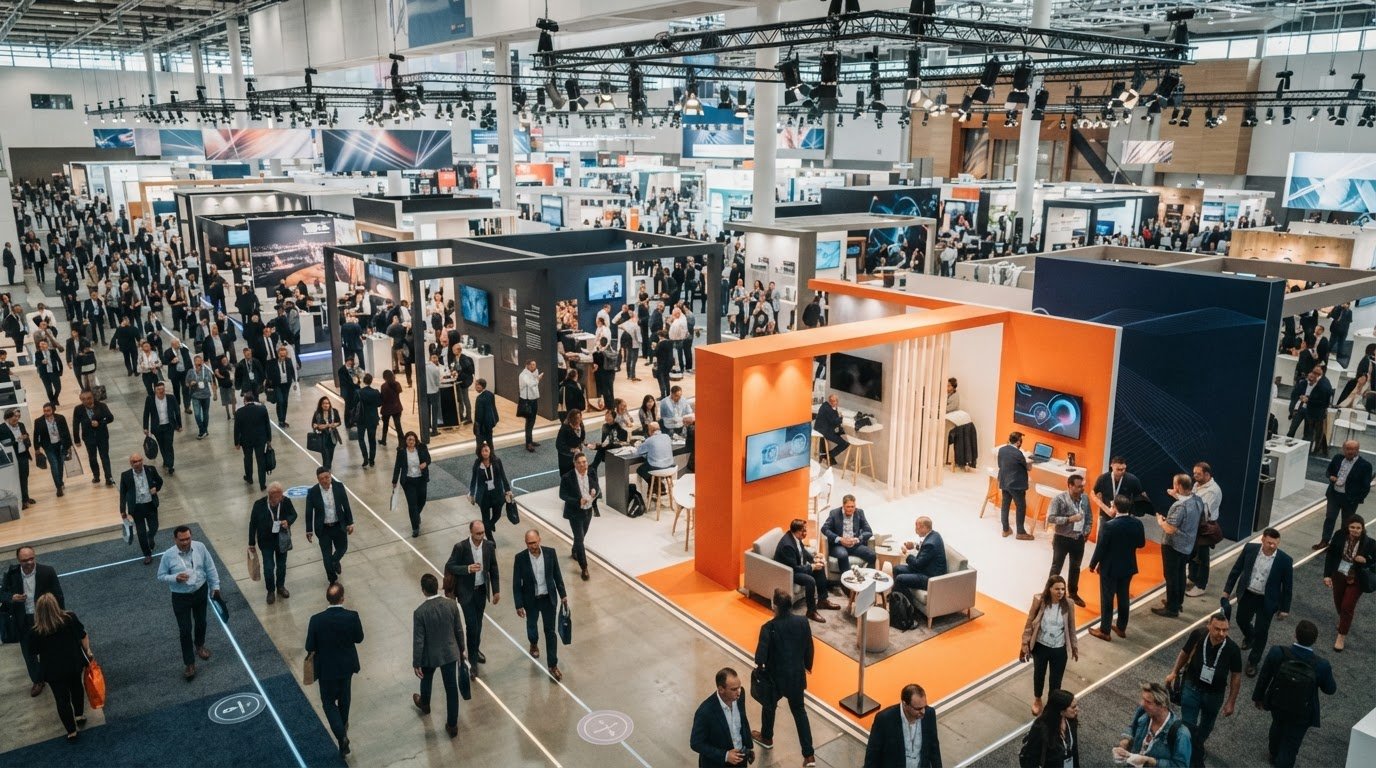
The busiest aisle isn’t always the best place to meet your next customer. Learning how to choose a trade show booth location means looking beyond foot traffic to the people you want to reach, the conversations you want to have, and the experience your space can support.
It’s natural to gravitate toward a prominent corner, an entrance, or a main intersection. But a high-visibility spot can bring congestion, competing distractions, or passersby who aren’t a fit for your goals. The right choice balances exposure with visitor flow, neighboring exhibitors, booth size, orientation, and event restrictions.
This guide offers a practical way to compare available spaces against your objectives, weigh the trade-offs, and spot drawbacks that can limit visibility or interrupt conversations. You’ll also learn how to turn your chosen footprint and sightlines into a branded display that feels intentional, not squeezed into place. When the location and layout work together, your booth can do more than catch attention: it can invite the right visitors into a useful conversation.
Key Takeaways
- Start with your event goal and target audience, then use those priorities to guide how to choose a trade show booth location.
- Trace attendee routes from entrances along main and cross aisles to identify useful sightlines and potential bottlenecks.
- Compare inline, corner, island, cross-aisle, and perimeter spaces by exposure, access, conversation room, and display demands.
- Use a simple scorecard to weigh audience fit, visibility, access, interaction space, and show restrictions before deciding.
- Shape your display around the selected footprint and open sides, choosing branded elements that support the layout rather than crowd it.
How to Choose a Trade Show Booth Location That Fits Your Goals
A prominent booth can attract attention, but attention alone doesn’t make a location the right choice. A position beside a main aisle may expose your brand to a steady stream of people while leaving little room for meaningful conversations. The best space supports your event goal and puts your team in front of the audience you want to reach.
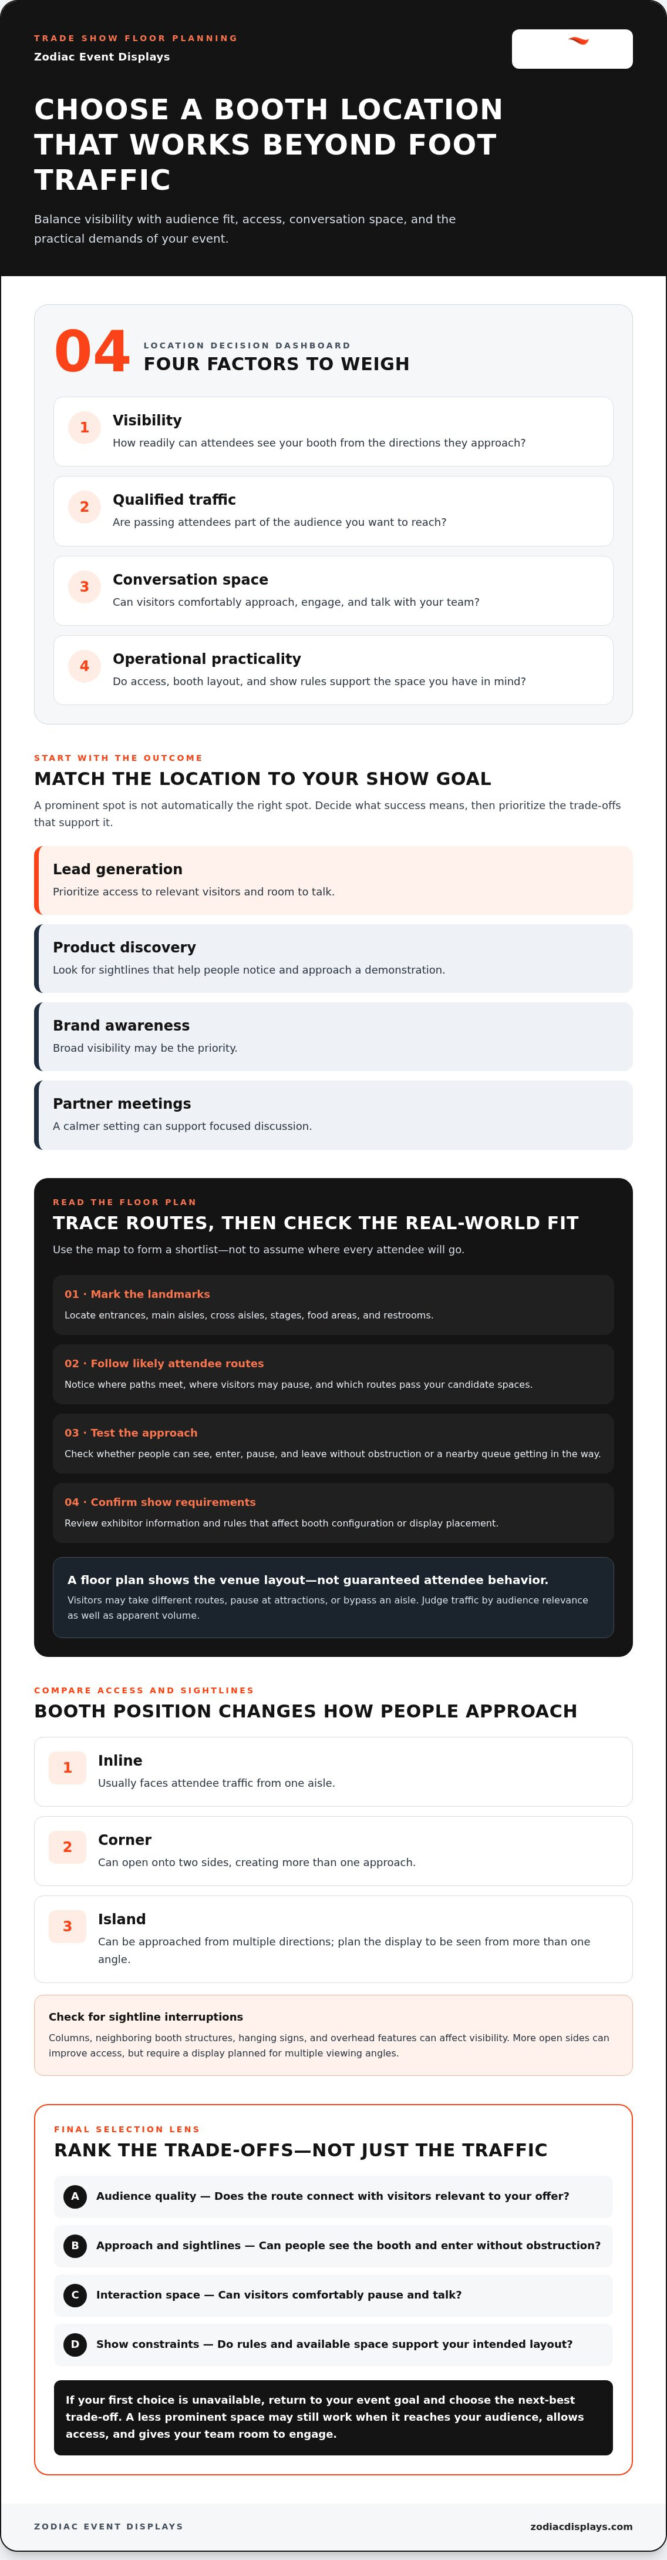
Weigh four connected factors: visibility, or how readily people can see you; qualified traffic, or whether passing attendees match your target audience; conversation space, or how comfortably visitors can engage; and operational practicality, including access, layout, and show rules. Your preferred spot may not be available, so selection priority and remaining inventory can narrow your options. Define what matters most before comparing spaces.
Trade shows bring exhibitors and attendees together on a shared exhibition floor. This Trade show overview provides useful background, but choosing a booth position calls for a closer look at your specific event and objectives.
Start with the outcome you want from the show
Set a clear goal before scanning for attractive spaces. Lead generation favors access to relevant visitors and room to talk. Product discovery benefits from sightlines that help people notice and approach a demonstration. Brand awareness may prioritize broad visibility, while partner meetings call for a calmer setting that supports focused discussion.
For example, a company seeking broad exposure may value a visible aisle-facing position. A team arranging conversations with a specific group may prefer a quieter location where visitors can pause. Neither goal is inherently better. The right choice depends on what success looks like for your show.
Don’t treat the four factors as interchangeable. A booth can be easy to see but hard to enter, or spacious enough for meetings yet tucked away from your target audience. Picture how your team will welcome visitors, explain an offer, and hold a conversation in the space. A location is useful only when its advantages support the experience you intend to create.
Understand what the floor plan can and cannot tell you
Mark entrances, main aisles, cross aisles, stages, food areas, and restrooms on the floor plan. These landmarks help you picture attendee routes and identify spaces that may be easy to spot or convenient to reach. Then compare candidate locations with the event rules and exhibitor information, including requirements that affect booth configuration or display placement.
A printed plan shows the venue’s layout, not guaranteed attendee behavior. People may take different routes, pause at attractions, or bypass an aisle. Treat the map as a planning tool, then consider how the event’s audience and schedule might shape movement. This helps you shortlist spaces based on plausible opportunities rather than assumptions about traffic.
Finally, distinguish the location you want from the space you can choose. If your first pick is unavailable, return to your goal and identify the next-best trade-off. A less prominent position may still work if it connects with your intended audience, allows easy access, and gives your team room to engage visitors comfortably.
Evaluate Booth Location Using Audience Flow, Sightlines, and Show Rules
A floor plan can reveal promising routes, but a busy aisle isn’t automatically a valuable one. To decide how to choose a trade show booth location, trace where attendees are likely to walk, then ask whether those people have a reason to stop at your booth. Location value depends on audience relevance, sightlines, and access.
Start with a simple route map. Mark entrances, then follow the main aisles and cross aisles toward stages, food areas, and major show features. Note where paths meet, where visitors may pause, and where a route passes your shortlisted spaces. This gives you a more useful picture than judging a booth by its distance from the entrance alone.
Read traffic patterns without assuming every crowd is valuable
Separate passing traffic from likely engagement. A crowd moving quickly between sessions may create visibility but leave little time to talk. A route connecting an entrance to a relevant stage or product area may bring fewer people past your booth, yet more of them may have a reason to stop. Match the route to your objective, not just its apparent volume.
Look closely at popular destinations. Food areas and stages can draw visitors, but queues may block access or pull attention away from nearby exhibitors. Restrooms can create foot traffic without necessarily creating interest. Ask whether people can comfortably approach, pause, and leave your booth without crossing a queue or competing with an adjacent activity.
Check sightlines, access, and exhibitor restrictions
View shortlisted spaces from the directions attendees will approach. Columns, neighboring booth structures, hanging signs, and other overhead features can interrupt visibility. Inline positions usually face traffic from one aisle; corner spaces can open onto two sides, while island booths can be approached from multiple directions. More open sides can improve access, but they also require a display planned to be seen from more than one angle.
Use a quick comparison to rank the trade-offs:
- Audience quality: Does the route connect with visitors relevant to your offer?
- Approach and sightlines: Can people see the booth and enter without an obstruction?
- Congestion and competing activity: Could queues, noise, or nearby attractions disrupt engagement?
- Rules and fit: Does the display plan work within the contracted footprint, orientation, and show restrictions?
Read the exhibitor manual alongside the map. Rules can specify booth boundaries, permitted heights, orientation, and display restrictions. Standard U.S. show guidance often limits a 10-by-10-foot linear booth to 8 feet at the back and sides, while perimeter booths may allow up to 12 feet; individual show requirements determine what applies. Base your decision on the event’s actual specifications, not an assumption about what fits.
Once you’ve assessed access and sightlines, carry those details into your display planning. A branded trade show display from Zodiac Event Displays can be designed around the selected footprint and the directions visitors will see it from, so the location and presentation work as one.
Compare Trade Show Booth Locations: Traffic, Neighbors, and Booth Type
Once you’ve mapped likely routes, compare the booth types. Each creates a different balance of visibility, access, and room for interaction. Use the floor plan to judge the position, then consider whether your team and display can make that position work for your event goal.
Inline: Typically faces one aisle, so visibility depends on a clear front-facing message and sightline. Its defined front can suit focused product information or scheduled conversations, though access is concentrated on one side.
Corner: Opens to more than one aisle, creating additional approach directions and display opportunities. That exposure can help visitors notice the booth, but intersecting traffic may crowd the entry if the layout doesn’t leave room to pause.
Island: Can be approached from multiple sides, offering flexibility for demonstrations and broad visibility. It also asks more of the display: messages and activity should make sense from different directions, and visitor flow needs deliberate planning.
Cross-aisle: Sits near a route intersection, where visitors may arrive from several directions. It can offer strong exposure, but people may pass quickly or gather at the junction, so access and conversation space deserve close attention.
Perimeter: Faces an aisle along the edge of the floor. It may have fewer approach directions than a corner or island, so a direct visual message and a display oriented toward the aisle can help it stand out.
Choose booth type according to visibility and interaction needs
Match the space to the action you want visitors to take. For broad exposure, compare positions with clear sightlines from multiple routes. For product interaction, favor a layout where visitors can approach and gather without obstructing the aisle. If scheduled conversations are central, a more defined front or a quieter edge position may support a focused exchange better than a busy junction.
The display should reinforce that choice, not fight it. This custom trade show displays guide can help you think through how format, messaging, and orientation relate to the selected position.
Assess neighbors and nearby attractions in context
Adjacent exhibitors can provide category context: visitors already interested in a related solution may be more likely to notice your offer. But a similar brand can also compete for attention, especially if its graphics or demonstrations dominate the shared sightline. Compare what attendees will see and hear from each approach, and plan a distinct message.
Food areas, restrooms, stages, and lounges can draw people nearby, but that doesn’t guarantee relevant stops. Queues may obstruct access, noise may make conversation harder, and visitors headed elsewhere may keep moving. As you decide how to choose a trade show booth location, weigh each feature against the audience you want and the interaction your team needs. Treat nearby activity as context, not a promise of leads.
Use a Simple Scorecard to Select the Best Available Booth Space
A scorecard turns a long list of trade-offs into a decision you can explain and act on. It keeps a dramatic-looking position from winning by default, while giving proper weight to the factors that matter most for your show objective. The best available space is the one that scores highest against your priorities.
Use this five-step process to compare your shortlist:
- Set your goal. Decide whether the priority is qualified leads, product interaction, brand visibility, or focused meetings.
- Shortlist spaces. Choose a manageable set of available locations that meet your basic booth-size and event-rule requirements.
- Assess trade-offs. Note advantages and drawbacks for each space, using the floor plan and exhibitor information as evidence.
- Score the options. Rate each criterion on the same scale, then apply weights based on your goal.
- Decide and plan. Select the strongest fit, then shape your display and staffing plan around its footprint and orientation.
Score the shortlist against your event priorities
Rate each location from 1 to 5, where 1 is a poor fit and 5 is an excellent fit. Write down why you assigned each rating, such as a clear approach from the relevant aisle or a restriction that limits your planned display. Evidence keeps the comparison grounded in facts rather than first impressions.
- Audience fit: How likely is this position to reach the visitors you want?
- Visibility: How clearly can attendees see the booth from likely approach routes?
- Access: Can visitors enter and leave without awkward turns or blocked approaches?
- Interaction space: Does the footprint support your planned conversations or demonstrations?
- Restrictions: Does the space work with the event’s rules for footprint, orientation, and display?
To weight the scores, assign each criterion a multiplier, such as 1 for lower priority, 2 for moderate priority, and 3 for highest priority. Multiply the rating by its weight, then add the results for each location. For lead generation, you might give audience fit and interaction space greater weight; for broad awareness, visibility may count more. There is no universal ranking for every event.
If two spaces tie, use a goal-based tie-breaker. A demonstration-led team might choose the location with better access for visitors to gather, while a brand-awareness team may favor the clearer sightline. Record the reason so the choice remains connected to your event plan.
Adapt when your preferred location is unavailable
If your first choice is gone, score nearby alternatives rather than assuming only entrance-adjacent positions can work. A less-central location may still fit if relevant visitors can find it and the layout supports a clear, welcoming approach. Recheck the footprint and orientation, too: a change may affect where graphics face, how visitors enter, and how the team staffs the space.
Once your location is set, translate its dimensions and sightlines into a display plan. Explore branded trade show display design to align your booth presentation with the space you’ve selected.
Match Your Booth Location With a Branded Display That Fits
Your location sets the stage; your display makes the space work. Once you’ve decided how to choose a trade show booth location, turn the floor-plan details into a practical design brief. Record the booth’s dimensions, open sides, orientation, sightlines, event restrictions, and the areas reserved for demonstrations or conversations. These details connect the position you selected with a clear, cohesive brand presence.
Turn floor-plan details into a display plan
Start with the attendee’s view. Note the directions people are likely to approach from, then decide which message should catch their attention from each angle. An inline booth may call for a strong aisle-facing focal point, while a corner position may need messaging that works from two approaches. For a multi-sided space, plan how the brand reads around the booth, not just from one front-facing view.
Next, sketch how the display elements relate to one another and to visitor movement. A backwall can anchor a message, while a custom flag or hanging sign may help identify the booth from farther away if the event rules and layout permit it. Table cloths can add a branded touch to a meeting or demonstration surface. Each element should suit the footprint, comply with show specifications, and leave clear access for people to enter, browse, and talk with your team.
Keep the message concise and readable from the viewing distance the space allows. Prioritize one central idea, then use supporting details where visitors can comfortably pause. Avoid placing visual elements where they compete with a demonstration or make the route into the booth feel unclear. The aim is a display that attracts attention and makes the next step easy.
Build the branded presence around the chosen space
Zodiac Event Displays brings creative design and fabrication together for branded trade show displays and related assets, with global delivery. With over ten years of experience in event displays, the team can shape a display concept around your booth’s orientation, sightlines, and intended interactions.
That could mean using a backwall display to establish a clear visual anchor, adding custom flags where they support visibility, or keeping the arrangement more open for conversations. Hanging signs and table cloths can also contribute when they suit the space and event context. The right combination makes your message visible while preserving room for the experience you want attendees to have.
Bring your event footprint, floor-plan orientation, and display goals together to develop a trade show display concept shaped around your selected booth space and brand.
Turn Your Booth Choice Into a Confident Show Presence
The next step is to make your location choice tangible. Before design begins, gather the booth dimensions, orientation, event specifications, key sightlines, and the visitor experience you want to create. This gives your display plan a clear foundation and helps your brand feel intentional from every approach.
Learning how to choose a trade show booth location is ultimately about making a considered choice, then building on it. Your space doesn’t need to be the most prominent on the floor to become a memorable destination. A well-matched display can bring focus to your message, welcome the right conversations, and make the most of the footprint you have.
Bring your booth details and goals together, then shape them into a distinctive branded presence with Zodiac Event Displays. Plan a branded display for your booth space and build your event presentation around the experience you want to create.
Frequently Asked Questions
Is a booth near the entrance always the best trade show location?
No, an entrance-adjacent booth isn’t automatically the strongest choice. Attendees may be orienting themselves, checking schedules, or moving toward a planned destination rather than ready to stop. Consider whether the position supports the kind of interaction you want, not just how soon visitors pass it. A location farther inside the hall can still suit your goals if it gives your team a clear way to connect with relevant attendees.
Should I choose a corner booth or an island booth?
Choose a corner if you want exposure from more than one aisle without designing for access on every side. An island can suit a larger, more open presentation, especially when visitors need to explore a demonstration from different angles. Think about how many staff members will engage visitors and whether your activity needs a defined presentation area. The best fit is one your team can manage comfortably while keeping the experience easy to understand.
Can a booth near food or restrooms attract the right attendees?
It can bring people into the area, but nearby foot traffic may include attendees focused on getting somewhere else. For example, a visitor waiting in a food queue may be close to your booth but unable to step over and engage. Think about whether the location offers a natural pause point without placing your conversations in the path of queues or competing noise. Treat proximity as an opportunity to assess, not a promise of qualified visits.
How do I evaluate trade show booth locations on a floor plan?
Start with the version issued for your specific event, then mark the candidate booth numbers and note the dimensions shown. Add your planned display outline to scale if possible, including any large visual elements, so you can see whether the arrangement leaves usable visitor space. Check that the map aligns with the exhibitor information and current booth specifications. If the plan changes, revisit your comparison before finalizing display artwork or production details.
What should I do if my preferred booth location is unavailable?
Keep a short list of alternatives, each chosen for a different strength, such as a clearer approach, a better fit for a demonstration, or more room for conversation. If your first choice is gone, compare the remaining spaces against the same event objective rather than selecting the nearest substitute automatically. Then adjust the plan: a changed orientation may call for a different graphic focal point, visitor entry, or staffing position.
Does booth location matter more than booth design?
Neither works in isolation. A strong position can make your booth easier to notice, while thoughtful design helps visitors quickly understand what you offer and how to engage. Design can make a less-central location more distinctive, but it can’t redirect the show’s foot traffic. Likewise, a visible booth may underperform as an experience if its message is hard to read or visitors can’t comfortably enter. Plan the space and presentation as connected decisions.
How can I compare trade show booth locations against my event goals?
Write down the main outcome you want, then identify what would help achieve it. For example, a product demonstration may need room for visitors to gather, while partner meetings may call for a calmer setting. Compare candidate spaces on those goal-specific needs and note any trade-off you’re accepting. This keeps the decision practical: you’re choosing a space for a purpose, rather than assuming one booth type or floor position suits every event.
 Previous reading