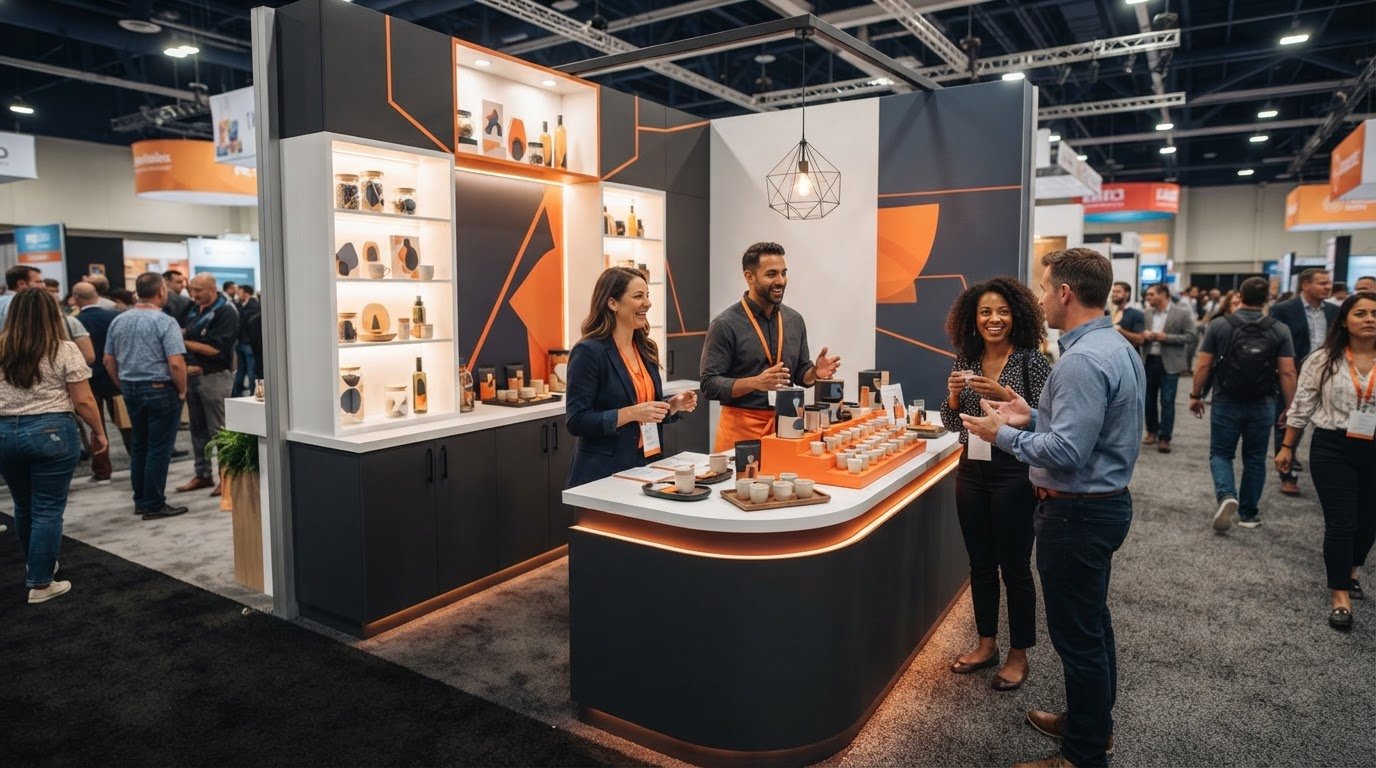
A compact footprint can still create a standout experience. A branded event sampling booth can pair a clear visual identity with an easy-to-follow sampling area, and 10×10 is the most common trade show booth footprint. The right layout makes room for product discovery without letting displays or queues overwhelm the space.
Sampling gives visitors a direct way to experience a product through taste, touch, smell, or sight. But a successful booth takes more than a sample table: its design, visitor flow, practical setup, and event environment all shape how easily people can approach and engage.
This guide covers how to plan the booth experience, choose display elements, organize sampling, and consider setup methods and footprints. It also explains what can affect project budgets, helping you build a polished, practical presence around your event goals.
Key Takeaways
- Assess your display from 10-20 metres away to see whether the branding and main message stand out at a distance.
- Shape the sampling layout around the product experience and attendee flow, keeping the approach inviting and uncluttered.
- Plan setup around the venue, booth components, and the people assembling them so the event-day process is clear.
- Use the 10×10 footprint as a practical starting point, then match the layout to your sampling, storage, and conversation needs.
- Explore how tents, backwalls, flags, and inflatables can build a cohesive presence for indoor or outdoor events.
Display design, lighting, screens, and attendee flow
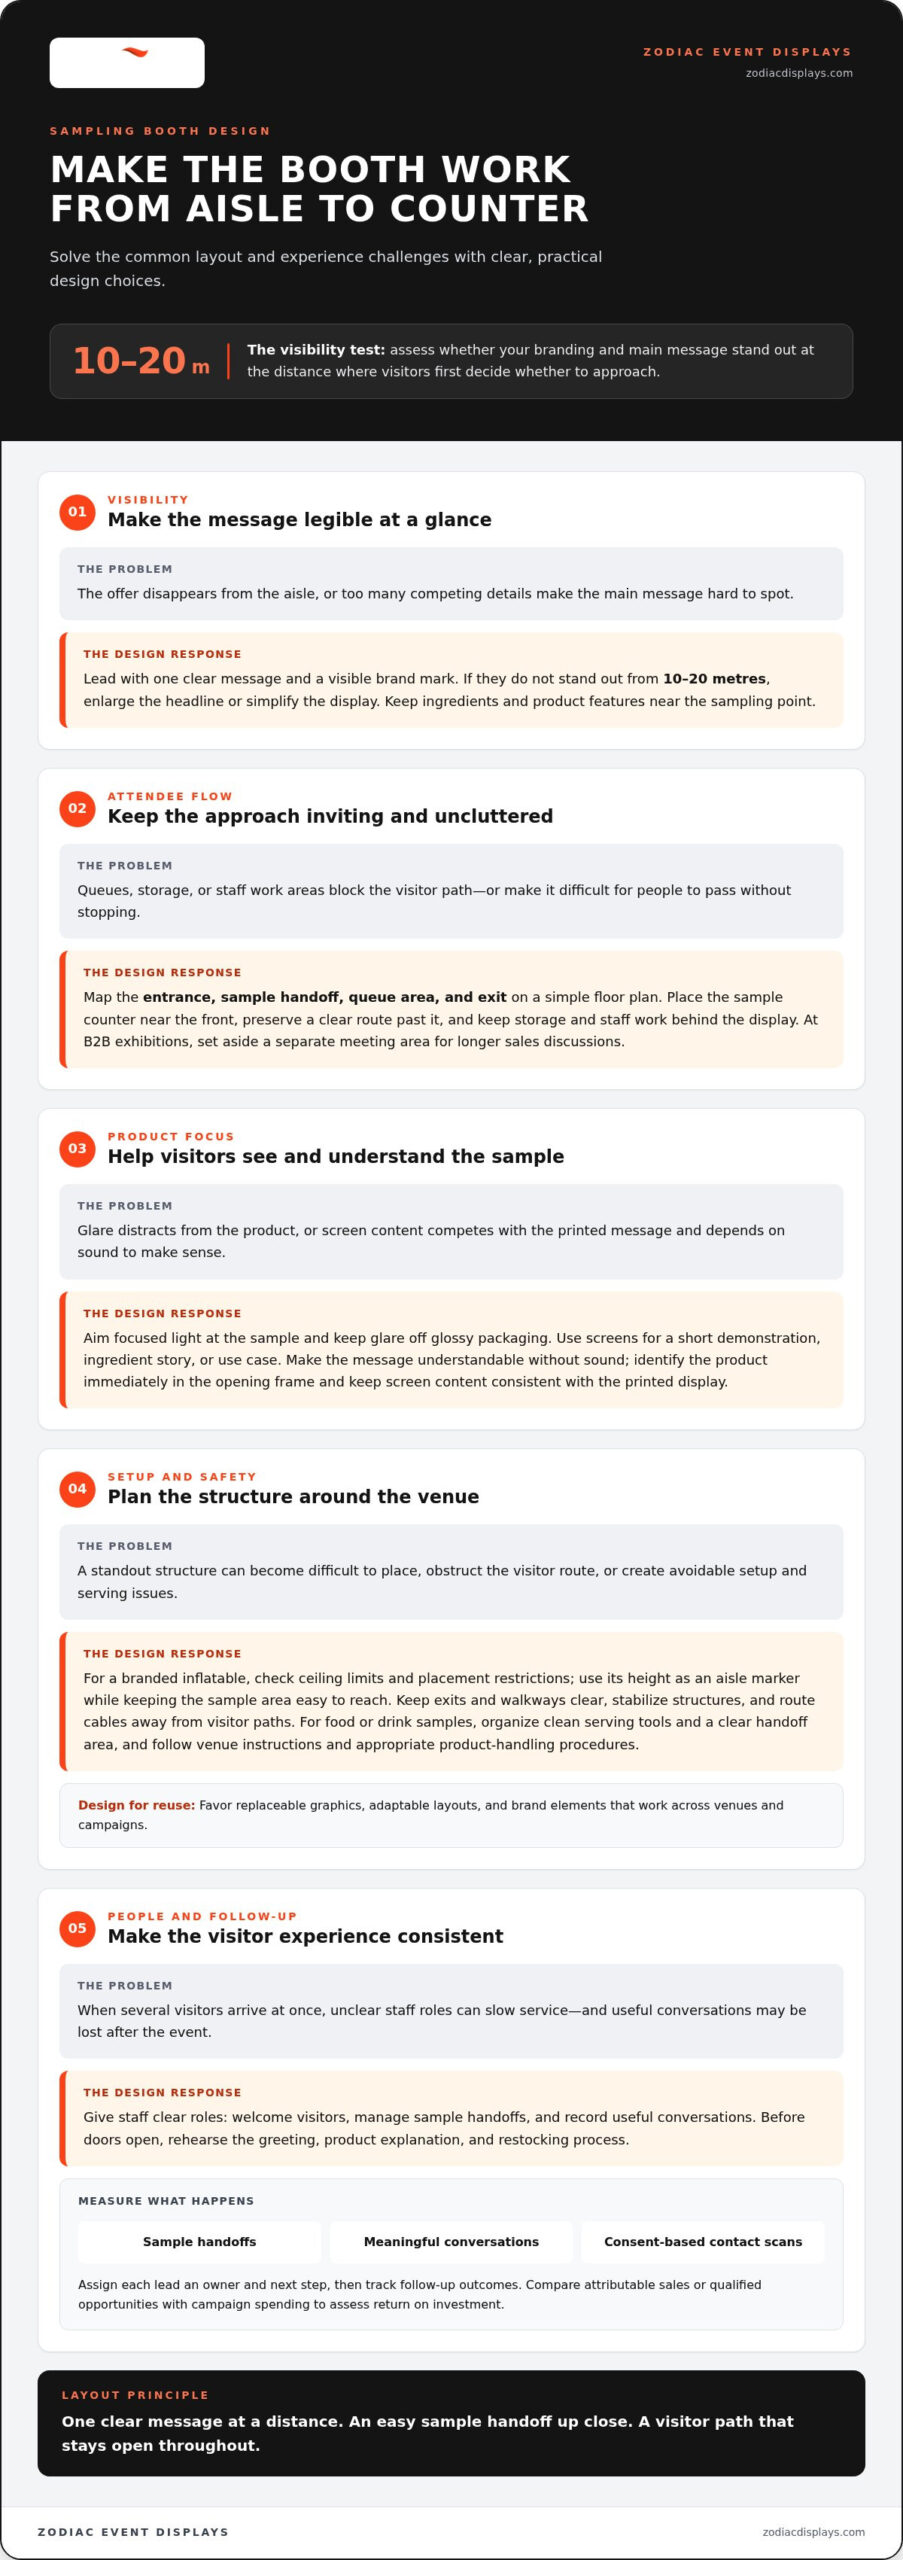
A branded event sampling booth needs to work from the aisle and at the counter. Begin with one clear message, a visible brand mark, and a direct invitation to sample. Then assess visibility from 10-20 metres away, where visitors first decide whether to approach. If the offer disappears at that distance, enlarge the headline or simplify the display. Keep secondary details, such as ingredients or product features, closer to the sampling point.
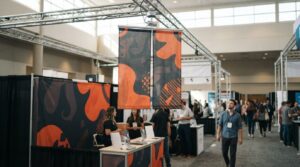
Map attendee flow before choosing display positions. Mark the entrance, sample handoff, queue area, and exit on a simple floor plan. For example, place the sample counter near the front, but leave a clear route past it for people who don’t want to stop. Keep storage and staff work areas behind the display, not in the visitor path. At B2B exhibitions, a separate meeting area gives qualified prospects space for longer sales discussions.
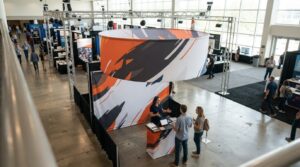
Creative direction brings several disciplines together: brand strategy sets the message, graphic design establishes visual hierarchy, and spatial design shapes movement. Production design translates those decisions into structures, surfaces, and printed graphics. A sampling booth project might start with a product package, campaign colors, and a sketch of the visitor journey. Test the concept at thumbnail size first. This makes it easier to see whether the logo, product image, and call to action compete for attention.
Lighting should clarify the product, not overpower it. Aim a focused light at the sample and keep glare off glossy packaging. Screens can show a short demonstration, ingredient story, or use case. Make the core message understandable without sound. A product-demo loop works best when its opening frame identifies the product immediately. Keep screen content brief and consistent with the printed display, so visitors see one coherent story.
Custom branded inflatables add height and distinctive form, so design their silhouette around the product or campaign idea. A large product-shaped inflatable, for example, can act as an aisle marker while a nearby counter handles sampling. Check the event plan for ceiling limits and placement restrictions, then keep the sample area easy to reach. For reuse, favor replaceable graphics, adaptable layouts, and brand elements that still work across different venues and campaigns.
Safety planning starts with the site and activity. Keep exits and walkways clear, stabilize structures, and route cables away from visitor paths. For food or drink samples, organize clean serving tools and a clear handoff area. Follow venue instructions and the handling procedures appropriate to the product.
Give booth staff clear roles: one person welcomes visitors, another manages sample handoffs, and a team member records useful conversations. Outfitting your team in cohesive branded apparel from specialists like B-BAM! Inc. can also make staff immediately recognizable to approaching attendees. Before doors open, rehearse the greeting, product explanation, and restocking process. This helps service run smoothly when several attendees arrive at once.
Measure engagement by recording sample handoffs, meaningful conversations, and consent-based contact scans. Assign each lead an owner and next step, then track follow-up outcomes. Compare attributable sales or qualified opportunities with campaign spending to assess return on investment.
Product sampling for new and lesser-known products
Sampling lets visitors experience a product rather than rely only on its packaging or pitch. For a trade show activation, connect the sample, display, and follow-up invitation around one clear product benefit.
Customer Product Trials
Product sampling introduces an item and invites visitors to try it through taste, touch, smell, or sight. A beverage sample offers taste; a fabric swatch lets visitors compare texture. Match the trial to the product’s strongest sensory quality, then make the next step clear, such as finding the product or learning how to use it.
For a new or lesser-known product, keep the trial simple enough to understand without a long explanation. Staff can invite visitors to sample, share a concise product detail, and ask what stood out. A branded event sampling booth can also gather customer feedback, using a clear, consent-based method to record useful responses.
Brand Activations Through Sampling
A sampling activation turns product trial into a focused brand experience. At a fair, for example, a promotional tasting might pair a sample with a short story about its ingredients or intended use. Keep the activity relevant to the product so the interaction feels helpful rather than intrusive. Sampling can encourage visitors to approach without pressuring them to stop.
Choose a location and format that suit the audience. Sampling often takes place in busy settings such as supermarkets, fairs, and schools. At a trade show, connect the sample station to the campaign message, then give visitors a simple way to continue the conversation. A specific question about preference can produce more useful feedback than a generic “Did you like it?”
Booths, Pop-Up Shops, and Mobile Carts
A sampling booth creates a recognizable home base, with a dedicated place for product trials and brand storytelling. A pop-up shop puts more emphasis on browsing and transactions, while a mobile activation cart can bring sampling closer to passing visitors. Choose the format that suits the experience you need: a stable presentation, retail-style exploration, or flexible outreach.
In a fixed trade show space, a backdrop and product display wall can frame the sample area and make the brand easy to spot. Keep product information beside the item instead of scattering it across the wall. The display should support conversation while leaving the handoff area accessible. Backwall Displays can provide a visual anchor for this kind of presentation.
Product demonstrations deepen the trial by showing how an item works. For a kitchen tool, staff might demonstrate its use, then invite visitors to handle it. For a skincare sample, a concise explanation can help visitors understand application. Keep the demonstration visible from the approach and make sampling the natural next step.
Sampling can suit product launches and established items that remain unfamiliar to audiences. It is also described as a lower-cost marketing option than some other forms of marketing. To shape a cohesive promotional display, explore event branding options alongside the trial experience.
Tool-free setup and installation
Tool-free assembly can simplify event-day installation, but the display design must support it. Look for clearly labeled components, intuitive connections, and setup instructions that match the actual display. Give the fabric graphic, frame, counter, and sample area each a defined place. Before packing, map those parts to the planned booth layout so the crew knows what connects and where it belongs.
Practice assembling the booth in the same order planned for the venue. Lay out each component, compare it with the assembly guide, and note any confusing step. For example, label matching frame sections with the same color or letter. Then time the process with the people who will build the booth. Rehearsal can reveal missing parts, unclear instructions, and awkward handoffs before event day.
Pack components by installation stage, not just by shape. Keep frame pieces together, group graphics with their designated support, and place small connectors in labeled pouches. Store the instructions where the setup crew can reach them first. A packing checklist can track each item as it goes into the case and comes out again, helping prevent a vital connector or graphic from being overlooked.
- Prepare the site: Review the floor plan, access route, and venue setup instructions.
- Sort the parts: Match labels to the guide before assembling the frame.
- Build the structure: Connect sections in the stated order, without forcing joints.
- Add the graphics: Align each panel and smooth visible folds as directed.
- Finish the station: Position sample supplies, storage, and staff materials after the display stands.
During installation, keep loose parts away from visitor routes and leave the work area clear. If a connection resists, pause and compare its label with the diagram. Forcing a part can damage a component or misalign the structure. Follow the display instructions and venue requirements, especially for placement, access, and nearby electrical equipment.
Plan teardown before the first visitor arrives. Photograph the assembled layout, then use that reference when repacking. Remove graphics as instructed, separate reusable components, and check them for visible damage. Return small parts to labeled pouches instead of leaving them loose in cases. This routine makes the next assembly easier and helps preserve a cohesive branded presentation across events.
Tool-free setup still depends on the display design, instructions, venue conditions, and crew familiarity. A modular layout can help teams assemble a sampling area without searching for tools, while a complicated configuration may need more preparation. Choose a structure that fits the event plan, product presentation, and people responsible for installation.
Booth and kiosk gallery
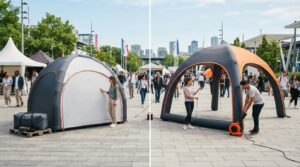
Event sampling formats range from compact kiosks and modular counters to tented or inflatable structures. Inflatable sampling booths can suit indoor or outdoor trade shows, carnivals, fairs, conventions, and other special events.
Branded Sampling Booth Types
A counter-based booth suits a focused handoff, such as offering a beverage sample across a branded surface. A kiosk can present one product with information close at hand, while a larger structure can give visitors room to browse or talk. Compare formats by sampling method, product size, staff workflow, and the venue’s available space.
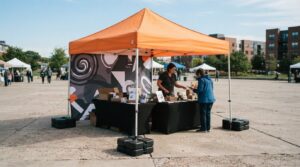
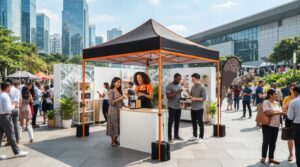
For outdoor events, a tent-style setup can define the sampling area and provide a clear visual anchor. A freestanding counter may suit an indoor aisle where visitors need quick access. Inflatable designs create a more sculptural profile, such as a product-inspired shape above a tasting station. Each format should make the sample easy to approach and the brand easy to recognize.
Match the structure to the visitor experience. A packaged snack might need a compact counter, product display, and serving area. A product that needs explanation may benefit from a kiosk with room for a demonstration. For a roaming crowd at a fair, a prominent inflatable can identify the activation from a distance, while a counter handles the actual trial.
Booth and Kiosk Examples
Picture a trade show kiosk with a front-facing product shelf, branded backdrop, and side counter for samples. This arrangement separates product viewing from the handoff. An outdoor fair setup could pair a canopy-style footprint with a sampling counter and an inflatable marker. Compare these concepts for visibility, visitor access, and the space each format requires.
A gallery review works best when you look beyond color and shape. For each example, trace the visitor’s path from first sight to sample pickup. Check whether someone can approach without blocking the next visitor, and whether staff can reach products and supplies. Even a striking structure needs a practical service area.
- Compact kiosk: Focuses attention on one product and a direct sample handoff.
- Modular counter: Supports a simple tasting or trial with nearby product information.
- Tented booth: Defines an outdoor sampling space for a fair or other event.
- Inflatable structure: Adds a distinctive profile at a convention, carnival, or trade show.
Before selecting a format, sketch the sample station, staff position, and visitor approach. Then compare the plan with gallery examples from similar event settings. The strongest choice supports the product trial, fits the venue, and keeps the promotional message visible without crowding the interaction.
Booth footprints and budget ranges
The 10×10 footprint is the most common trade show booth size. In the United States, you can rent or buy a sampling booth; choose based on event frequency, reuse plans, and the experience you want to create.
Booth Footprints
A 10×10 space offers a familiar starting point for a compact sampling setup. Use it for a counter, product display, and clear visitor approach. Larger footprints can support added demonstration space or separate conversations, while smaller spaces call for a sharper focus on essentials. Map the venue’s assigned area before choosing the structure.
Footprint alone doesn’t show how usable a booth will feel. Mark the counter, staff position, product storage, and visitor path on a floor plan. For example, place the sample handoff near the front while keeping supplies within staff reach. Compare the sketch with the event’s space boundaries and access routes.
Size, Layout, and Equipment
Choose equipment to suit the product trial. A tasting station needs a counter for samples and appropriate serving supplies—such as custom drinkware from Personalised Glasses Australia for beverage presentations—while a hands-on demonstration needs room for visitors to see and try the product. A branded backdrop can identify the display, while a table covering creates a cohesive counter surface. Keep every element useful to the experience.
For a 10×10 layout, sketch the visitor route before arranging display pieces. Allow visitors to approach, pause, sample, and leave without crossing the staff work area. Position storage behind or beside the counter, not in the main path. Match the equipment list to the sampling method, product handling, and event setting.
Budget Ranges
Booth budgets vary with footprint, structural complexity, graphics, equipment, shipping, and installation needs. A simple reusable setup has different requirements from a custom exhibit with extensive fabrication or integrated screens. Separate design, production, transport, and event-day needs in your planning, then prioritize the elements visitors will notice or use.
To compare options, define the essential experience first. List the display structure, branded graphics, sampling counter, and any demonstration equipment. Then distinguish needs for a single event from assets intended for reuse. This makes trade-offs clearer: a versatile backdrop may serve several campaigns, while a highly specific structure may suit one product launch.
Renting can suit a temporary activation with limited reuse plans; buying can make sense when a consistent setup will serve repeated events. Compare the full scope, including graphics, transport, setup, and storage, rather than focusing only on the structure. For a reusable branded presence, explore custom event display options and match the format to your footprint and sampling plan.
Zodiac Event Displays: Event Tents
Zodiac Event Displays creates visible event environments with Event Tents for outdoor sampling and branded activations. An Event Tent can define the sampling area and provide a clear focal point, while Backwall Displays, Custom Flags, and Inflatables add complementary brand visibility.
Choose elements around the venue and visitor experience. For example, pair an Event Tent with a sampling counter, then use a Backwall Display to frame product information. Custom Flags can mark the approach, while Inflatables create a distinctive visual feature. Each piece should support the event layout and make the sampling point easy to find.
For a branded sampling setup tailored to your event, contact Zodiac Event Displays.
Make Your Next Event Work Harder
Give your next activation a clear purpose before choosing its final look. Decide what visitors should experience, remember, and do after sampling. Those choices can turn a branded event sampling booth into a considered extension of your campaign rather than a standalone display.
When shaping the visual environment, Event Tents, Backwall Displays, and Custom Flags can help establish a recognizable presence. Choose pieces that suit your event setting and product story, then build a layout that feels cohesive from first glance to sampling interaction. A focused plan gives your team a strong foundation for bringing the experience to life.
Explore event display options with Zodiac Event Displays and take the next step toward a booth designed around your goals. Your next event can be distinctive, purposeful, and ready to welcome visitors.
Frequently Asked Questions
What is a branded event sampling booth?
A branded event sampling booth is a dedicated event space where visitors can recognize a brand and experience its product. It combines visual identity with a practical sampling point, such as a counter displaying packaged samples and product information. Unlike a simple giveaway table, the booth creates a defined setting for interaction. Its scale and components depend on the venue and type of product trial.
How much does a sampling booth cost to rent or buy?
There’s no single price for buying a sampling booth: costs depend on the structure and project scope. Zodiac Event Displays sells branded event displays, including Event Tents, Backwall Displays, Custom Flags, and Inflatables, but does not rent event equipment. For a purchase, define the components and graphics you need before requesting project pricing. Rental costs are separate from the purchase of Zodiac products.
What factors affect the price of a custom sampling booth?
Custom booth pricing depends on design work, fabrication, printed graphics, and structural complexity. A simple branded counter and backdrop require a different production scope from a bespoke structure with integrated features. Artwork preparation can also affect the project, especially when files need layout adjustments. Clarify the scope by identifying which components need custom graphics and which can use standard layouts.
How do you design and build a branded sampling booth?
Start with the product trial and brand message, then sketch the visitor experience from first glance to sample. Select a structure and surfaces that suit the venue, and prepare artwork to the display specifications. A branded event sampling booth should give every element a clear purpose. Review the design in context, test the assembly, and prepare components for transport.
 Previous reading